Showing posts with label Module 1. Show all posts

Sunday, 24 April 2011

Module 1 – Evaluation of Completed Resolved Sample

Cost and Time

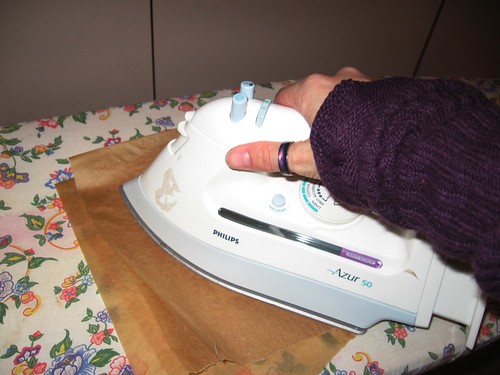
It’s very difficult to cost this resolved sample as much of the materials used were ‘recycled’ from my scrap boxes!  It’s tough to cost fabric that was free (people donate old clothes etc to me to cut up).  So I guess one way to look at it would be to think about how much things would cost from new.  So let’s assume I’ve used the equivalent of 4 fat quarters cut up, so that’s approximately £2 per fat quarter.  I used maybe a tenth of a piece of gold organza from a set of two organza curtains I bought from a charity shop for £3.99 (bargain or what!). An eighth of a reel of thread which was on offer at £1 for 4 reels (end of stock deal). Oh and I mustn’t forget that I broke a needle on my machine and needed to replace it so that’s 1 from a set of five value needles purchased for £1.50.

In Summary:

  • Fabric: £8.00 + £0.20 = £8.20
  • Thread: £0.03 (crikey!)
  • Machine needle: £0.30
  • TOTAL COST: £8.50

Date the work was started: 6th February 2011

Date the work was completed: 23rd April 2011

Date when embroidered piece was started:  7th February 2011

Date when embroidered piece was completed: 23rd April 2011

Total hours spent on design work: 7 hours

Total hours spent on stitched work: 18 hours

----------------------------------------------------------------------------------

Evaluation

Chapter 11 - Resolved Piece Finished

Tutor Question: How do you feel about the resulting conclusion?

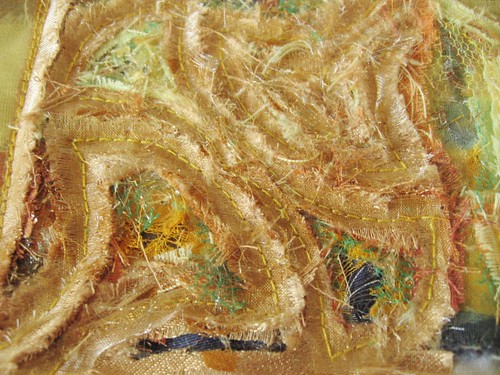
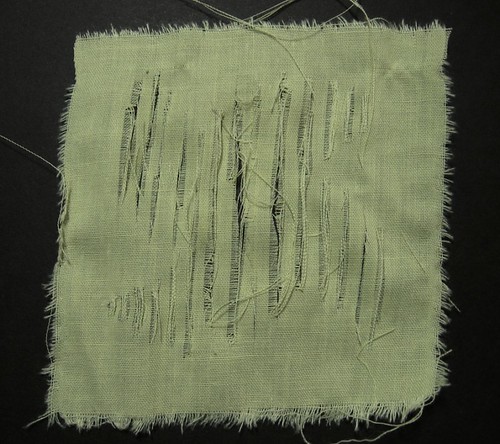
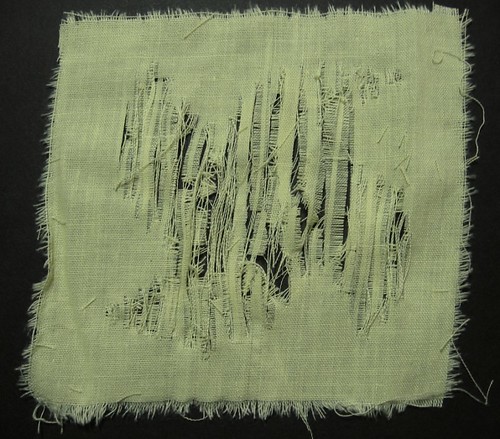
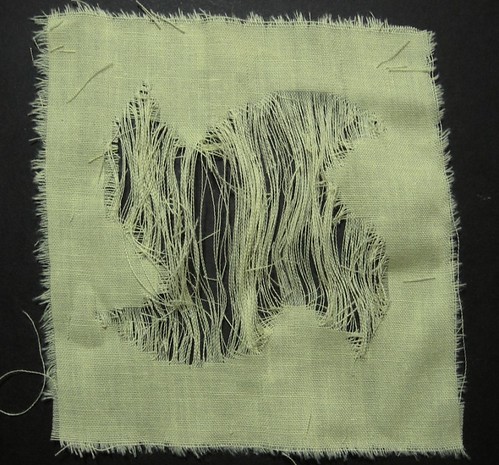
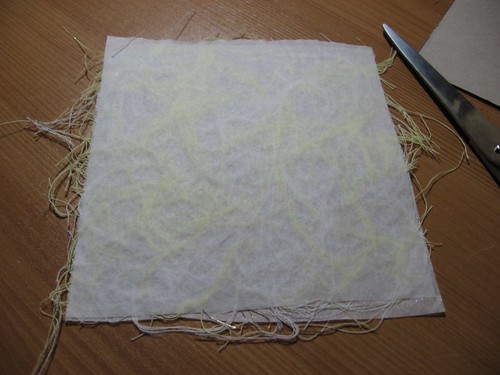
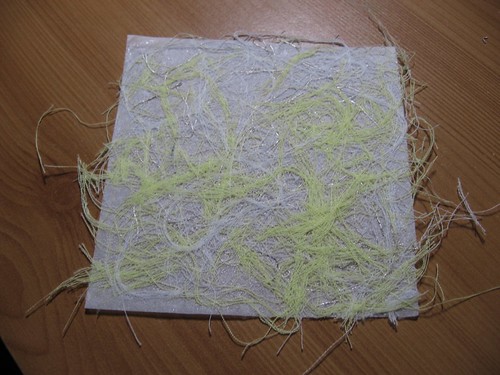
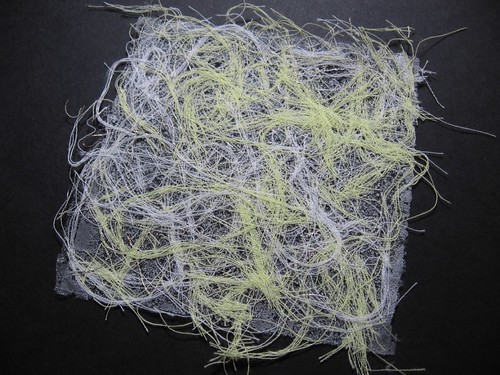
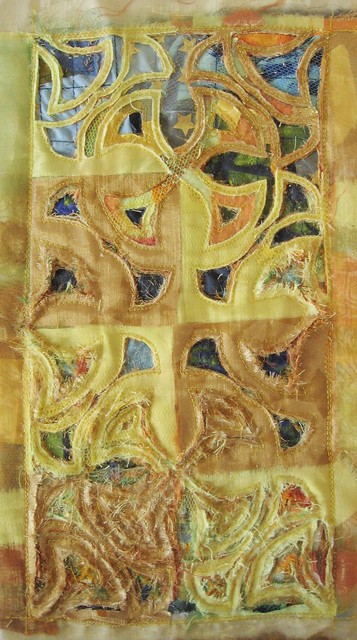
I have mixed feelings about my resolved sample.  I am pleased with the slashing and clean cutting lines showing the texture/contrast but I don’t feel like they run into each other particularly well.  Though if I ran the slashing too far up into the more cutwork areas it would be too much so left an area of ‘background’ untouched to provide some kind of contrast.  Looking at it now, though, the area untouched in the middle shows a shape that I didn’t notice before (see image below)!  That’s only revealed because it’s untouched so actually I quite like that.

Chapter 11 - Revealed shape by not cutting

Tutor Question: If you were asked to make it again, what changes would you make to the way you designed it and the way you made it?

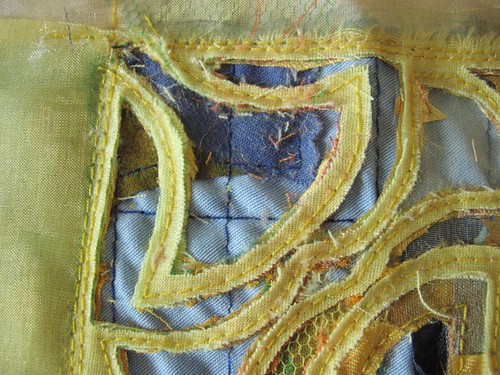
If I did this task again I would probably put more thought into my plans before I picked up any fabric.  I had an ‘idea’ in my  head from the paper design work but I wasn’t 100% sure of what I was going to do.  As a result of this halfway through making the piece I came up with different ideas which I think I could have done instead.  I made the mistake of just having a bottom layer of blue and then lots of layers of yellow.  I think my original idea was to cut away to reveal the blue in various ways but now realise that perhaps I should have layered the blue/yellow throughout.  There were lots of layers of gold etc but you can’t really see that at all from what I’ve done.  Although the images don’t really do the piece justice if I’m honest.  If I did this again I would plan my layers more carefully.  And add green.  For some reason I feel this is crying out for some green!  I don’t know why, I just feel that way!  I would enlarge one section and just work with that too.  I love slashing so maybe I would just come up with a design that involved the piece going from mega-slashed (as in the bottom left of my existing piece) and then gradually getting less slashed so the shapes become more and more visible with no other technique.  Having said that I have ideas about having layers of drawn thread work which is entirely different altogether!  The ultimate thing I have learnt here, though, is that whilst it’s lovely to have ideas evolve in front of your eyes, I need to plan much better! 

Module 1 – Health and Safety Notes

Tools

Sharp Tools (scissors, blades, pokey-tools, rotary cutter, stitch-unpick etc):

  • Use sharp tools with full focus to reduce the opportunity for accidents
  • Make sure tools are as sharp as they should be – using a blunt blade, for example, means applying more pressure etc and overzealous action can be dangerous
  • Stating the obvious – keep fingers (and other items of the body!) away from the sharp edges
  • When using a poking tool make sure pressure is applied away from the body to avoid being accidentally stabbed
  • Use a cutting mat, or similar protective surface, to avoid damage to furniture and ensure cutting takes place on a firm flat surface

Hot tools:

  • When ironing use a suitable surface underneath.  I use an ironing board with a cover that is only used for creative purposes as it’s covered in dye, wonderweb and so forth.  I wouldn’t want any of that on my clothes!
  • Take care when using a soldering iron for slashing/burning – use on a protective surface and place the iron carefully when not in use so that it doesn’t roll onto the floor and, say, melt your carpet
  • Visually inspect the wires on electrical items for damage, starting from where the wire enters the equipment and working right through to the plug.  Inspect the plug also.
  • Visually inspect the socket that the item is being plugged into for damage – do not attempt to fix any electrical sockets/items unless you are properly qualified to do so
  • Ensure there are no trailing wires when using electrical equipment to avoid trip hazards
  • Use the right temperature for the fabric to prevent singeing or a possible fire event
  • When burning fabric deliberately do so in a well ventilated area and avoid breathing in the smoke – especially when using manmade fibres.

Mediums

When using paints/inks:

  • Ensure that surfaces are protected (I used a lot of scrap paper on a dedicated desk that I don’t mind getting covered in paint splatters)
  • If using your hands to directly apply the point make sure that non-toxic paint is used
  • Wash hands thoroughly after use
  • Protect clothing from accidental stains (I have an old top that I use for this)
  • Take care to keep mediums away from pets (I do not have any pets) – they could be poisonous or the animal could just cause spillage chaos!
  • When using paints with a fume, including spray paints, do so in a well ventilated area – lots of windows open or outside is preferable.  Use a face mask when necessary

Glue

  • As with other mediums protect your surfaces
  • Check the instructions on the glue and follow implicitly
  • Only use a glue if it’s suitable for the purpose – test a small sample if necessary to avoid any major gluing disaster
  • When using adhesive with a fume ensure the area is well ventilated – use a face mask where necessary
  • Keep all glues away from the mouth, nose, ears and especially the eyes

 Sewing

  • Do not put pins or needles in the mouth.  My late grandmother once swallowed a pin and had to go to hospital so it does happen!
  • Use the right needle for the job to make things easier
  • Use a thimble if necessary (although I, personally, cannot get on with thimbles) and when pushing a needle through a thick layer using force do this over a surface so you don’t stab yourself in the leg
  • When using a sewing machine it may be an idea to tie long hair back to avoid it getting caught in moving parts of the machine
  • It can be useful to have a magnet handy in the case of dropped pins and needles – depending on the metal the magnet can sometimes pick these up quickly and easily

Storage

  • Keep all items stored safely away from children and pets.  I have neither so I don’t have to worry about that!
  • When storing paints etc ensure that the surface they are housed on is flat and level so that nothing falls on the floor and spills
  • Store lose sequins, beads and buttons in pots/jars to avoid any accidental spillage (and choking hazards if you have children or pets)

Saturday, 23 April 2011

Resolved Design

I started my resolved piece by making a base piece of blue fabric scraps stitched together.

Image 1 – Blue base

Chapter 11 - Base Layer

Then I layered up yellow fabric scraps holding them down with pins (the fabric is on a piece of corrugated cardboard so that I could stab the pins into it) .

Image 2:

Chapter 11 - Layering Scraps 1

Image 3:

Chapter 11 - Layering Scraps 7

After putting down a few layers of yellow scraps I then placed six 8x8cm squares of fabric on top…

Image 4:

Chapter 11 - Placing the Squares 1

…and then covered the entire piece with gold organza and tacked it all into place.

Image 5:

Chapter 11 - Organza Layer

I traced my chosen pattern onto tissue paper, tacked this onto the piece and stitched with my sewing machine (small running stitch).

Image 6:

Chapter 11 - Tissue Paper 1

After all the lines were stitched I carefully removed the tissue paper.

Image 7:

Chapter 11 - Stitched Outlines 1

With all the preparation done I started slashing! 

And then stopped. 

I decided halfway through that I didn’t like what I was doing.  I left it a while and returned to it today in a far better mood about it!  So I carried on slashing!

Image 8 – The resolved piece:

Chapter 11 - Resolved Piece Finished

Image 9 – The bottom left part of the piece which is very textured and the shapes are difficult to see clearly:

Chapter 11 - Resolved Piece Detail 9

Image 10 – The top right corner where the layers are cut away to show clear distinction in shape:

Chapter 11 - Resolved Piece Detail 11

Sunday, 6 February 2011

Working on a Resolved Design

I started to work on the resolved design for the module about a week ago.  I feel stuck.  I have ideas of what I want to do but I can’t find a way to translate them onto paper.  I think in my head I’m trying to go backwards.  The idea is to create a paper design and work from that but, well, I know that I want to – or at least the technique I want to use - and I’m trying to force the paper design into what I’m thinking about.  But I’m not completely clear on what I’m thinking of so I’ve got myself into a little pickle!  Well here’s what I’ve come up with so far.  I’m going to ask Sian for some guidance.

Image 1 – I was playing with my favourite star/cross shape when I noticed the void created:Doodle

Image 2 – My first play with papers.  I wanted to look at the voids I’d spotted in the previous drawing:Sheet 1

Image 3 – I used the same cut squares but this time really concentrated on the voids with them being more filled in at the centre:Sheet 2

Image 4 – Close up of the middle set of voids.  I’ve filled them in but feathered the edges so there aren’t solid blocks:Sheet 2 - Close Up Middle

Image 5 – Close upSheet 2 - Close Up

Image 6 – This was just me playing with different cutting of the shapes: Sheet 3

Image 7 – Close up of one of the cut shapes.  I really like the spiral effect of the shape:Sheet 3 - Spiral shape

Image 8 – A play on the ‘windmills’ from earlier in the chapter but this time I turned them upside down:Sheet 4 - Spirals

Image 9 – More ‘windmills’!Sheet 4 - Spirals angled

Image 10 – I had some left over cut pieces from the earlier designs so I used them.  I like the shapes formed where the two middle pieces cross:Sheet 5 - Leftovers!

Image 11 – Close up of the middle:Sheet 5 - Closer

Making Fabric Disintegrate or Grow 3

Making a shape using multiples of the same shape.

Image 1 – First I cut out shapes from my decorative fabrics:Chapter 11 - Disintegration with Stitch - 19

Image 2 – I cut squares of gold organza and pinned them to a yellow backing fabric, sandwiching in some yellow netting.  I sewed each organza square individually:Chapter 11 - Disintegration with Stitch - 15

Image 3 – The finished backing:Chapter 11 - Disintegration with Stitch - 17

Image 4 – Close up of the backing fabric:Chapter 11 - Disintegration with Stitch - 18

Image 5 – Next I added the cut shapes and free embroidered them:Chapter 11 - Disintegration with Stitch - 21

Image 6 – Stitching the final shape:
Chapter 11 - Disintegration with Stitch - 22

Image 7 – The finished piece. I really like the shapes of the voids produced:Chapter 11 - Disintegration with Stitch - 23

Image 8 – Close up: Chapter 11 - Disintegration with Stitch - 25

Making Fabric Disintegrate or Grow 2

Here I’m using stitch to grow or disintegrate a shape.

Image 1 – My desk while I was working.  What a mess!Chapter 11 - Disintegration with Stitch - 8

Image 2 – Making a shape ‘disappear’ by using stitching of the same colour as the background.  The more stitching the more the shape vanishes:Chapter 11 - Disintegration with Stitch - 9

Image 3 – Close up of sewing the parallel lines on the machine:Chapter 11 - Disintegration with Stitch - 12

Image 4 – Close up of square:Chapter 11 - Disintegration with Stitch - 10 

Image 5 – Cutting away the shape: Chapter 11 - Disintegration with Stitch - 1

Image 6 – More stitch lines and cutting away a smaller section of fabric:Chapter 11 - Disintegration with Stitch - 2

Image 7 – Yet more stitching and even less fabric cut away:Chapter 11 - Disintegration with Stitch - 3

Image 8 – close up of cut away area:Chapter 11 - Disintegration with Stitch - 4

Image 9 – Hiding a shape using bondaweb and thread waste:Chapter 11 - Disintegration with Stitch - 7

Image 10 – Hiding a shape using different coloured threads:Chapter 11 - Disintegration with Stitch - 13

Image 11 – Close up:Chapter 11 - Disintegration with Stitch - 14

Making Fabric Disintegrate or Grow 1

Here I’m ‘growing’ the shape by slashing the fabric and then fraying.

Image 1 – Slashing a square of fabric to create the shape:Chapter 11 - Disintegrating Fabric 21

Image 2 – Several slashed squares.  The shape slowly appears:Chapter 11 - Disintegrating Fabric 22

Image 3 – Close up:Chapter 11 - Disintegrating Fabric 24

Image 4 – Close up:Chapter 11 - Disintegrating Fabric 25

Image 5 – Close up:Chapter 11 - Disintegrating Fabric 26

Disintegrating Fabric 2

I decided to have a play with bondaweb and thread waste to ‘grow’ a piece of fabric!

Image 1 – First I covered a piece of bondaweb with yellow, white and silver thread waste:Chapter 11 - Disintegrating Fabric 13

Image 2 – With another piece of bondaweb on the top I ironed to bond using greaseproof paper to prevent scorching:Chapter 11 - Disintegrating Fabric 14

Image 3 – My bondaweb thread sandwich:Chapter 11 - Disintegrating Fabric 15

Image 4 – Off came the top backing paper:Chapter 11 - Disintegrating Fabric 16

Image 5 – Off came the other backing sheet to reveal my bonded square:Chapter 11 - Disintegrating Fabric 17

Image 6 – Close up of the square.  You can see the texture of the melted glue and in the right light it sparkles a little:Chapter 11 - Disintegrating Fabric 18

Image 7 – My chosen shape cut out from the bonded fabric square:Chapter 11 - Disintegrating Fabric 19

Image 8 – The remaining bonded fabric square (I like this more than the actual shape itself!):Chapter 11 - Disintegrating Fabric 20