Sunday 15 May 2011

Chapter 2 – Blackwork and Tonal Effects (2)

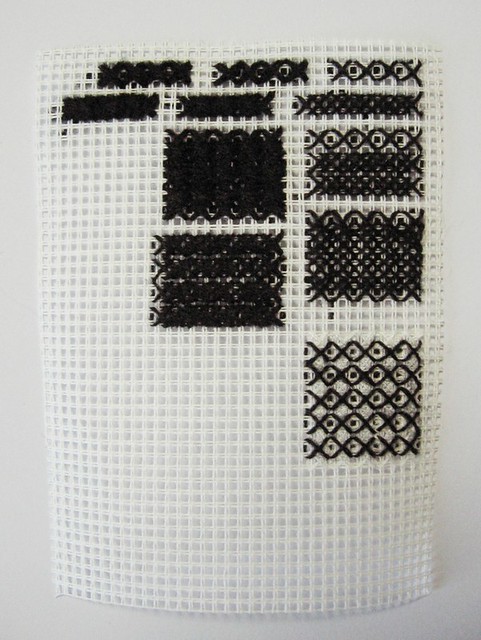
So with the planning done I moved on to the extra enjoyable bit – the stitching. 

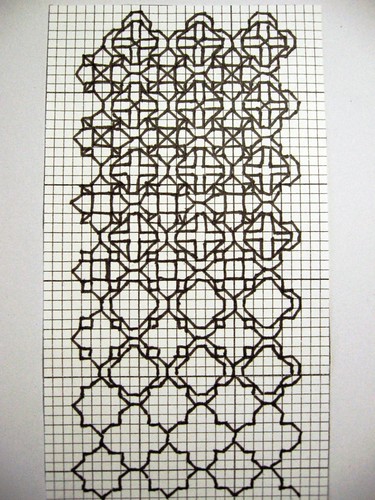
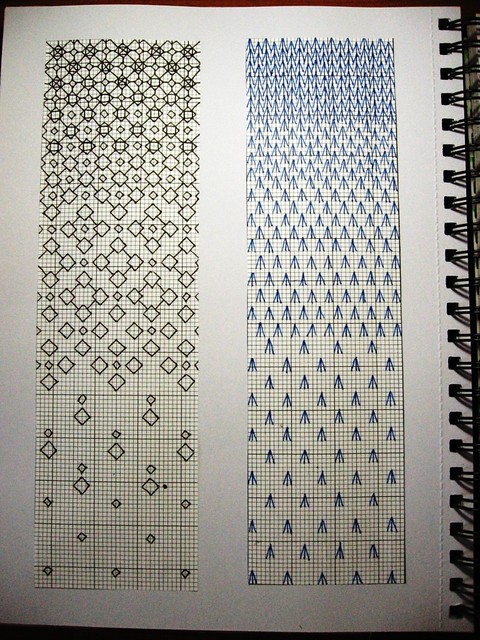
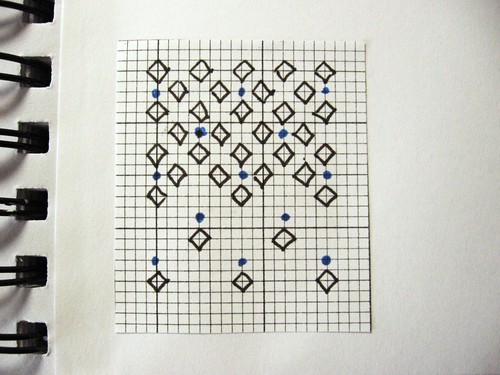
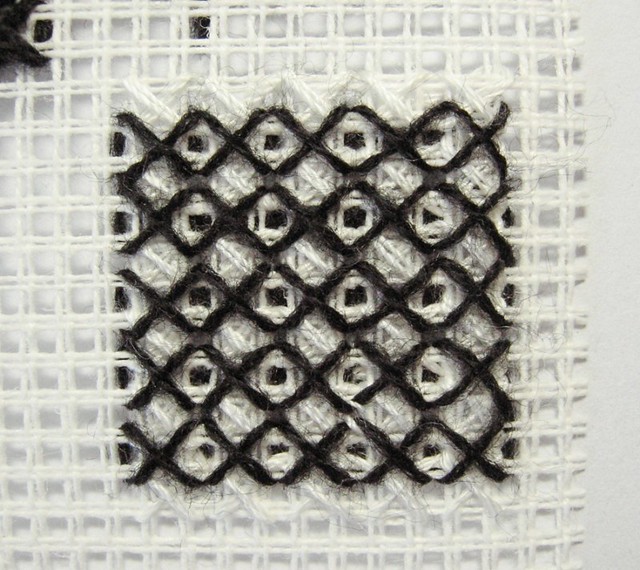
Tonal Column 1 – Using Pattern Development

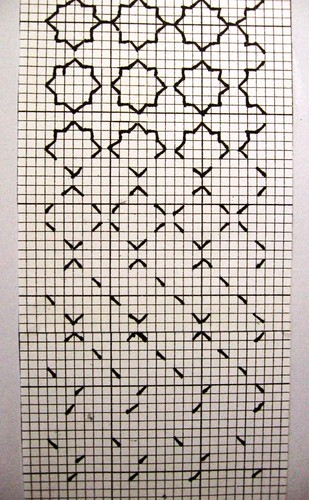
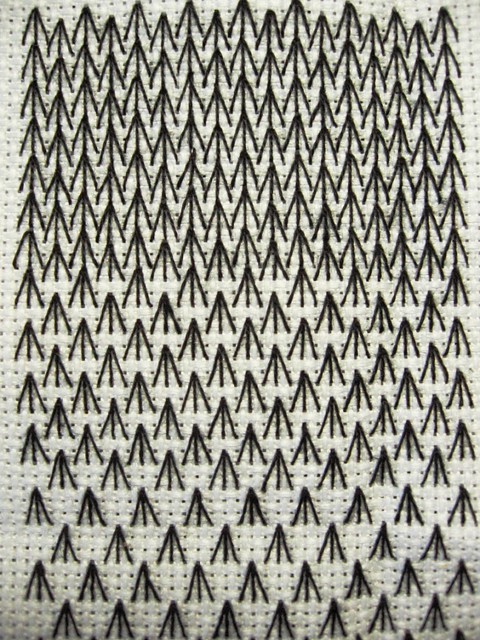
For column 1 I used one strand of embroidery floss and built up the pattern gradually.
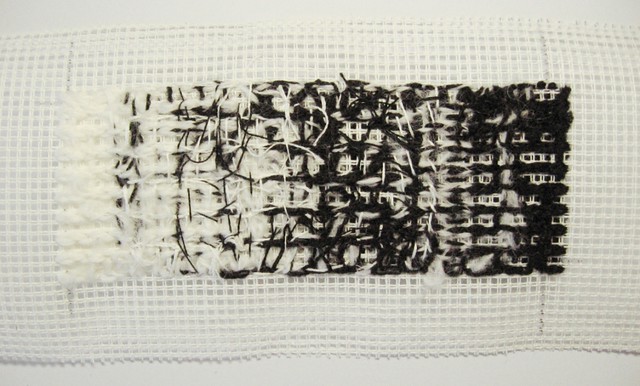
Image 1 – column 1:

Tonal column 1

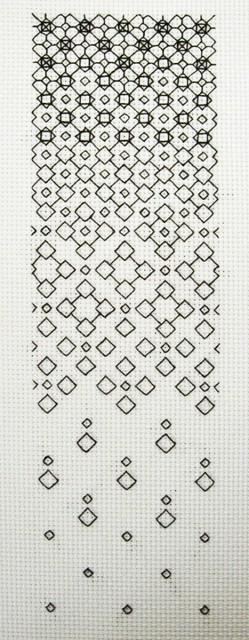
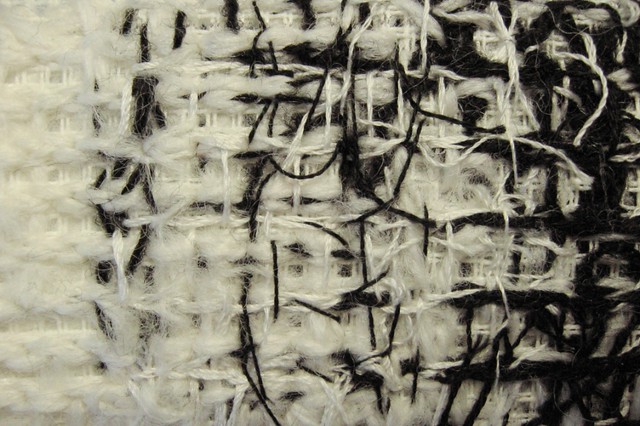
Image 2 – close up of column 1:

Tonal column 1 - close up 1

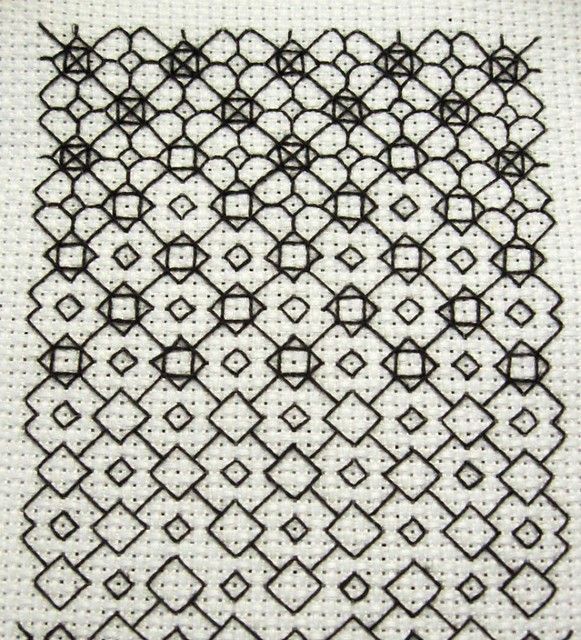
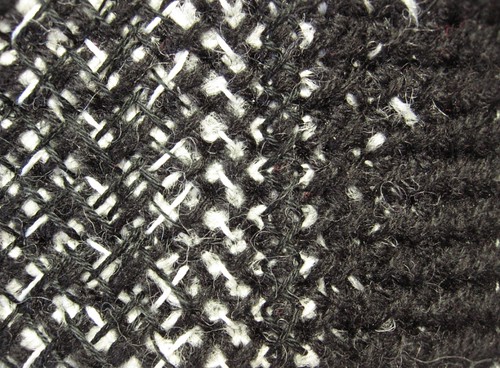
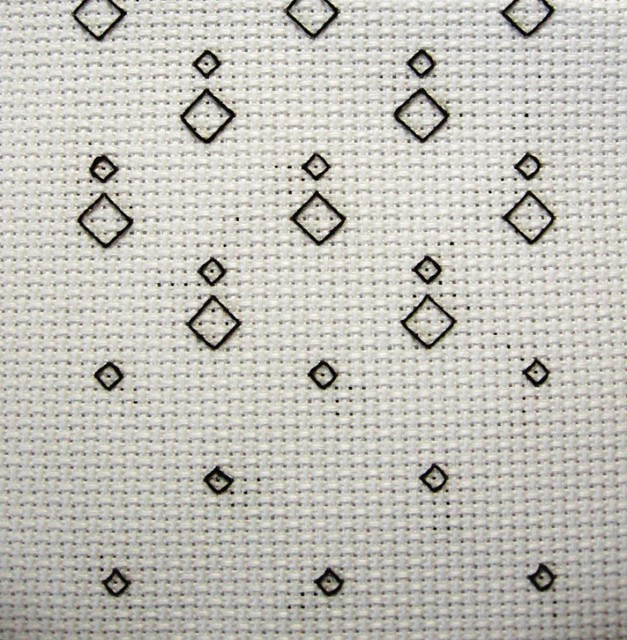
Image 3 – close up of column 1 

Tonal column 1 - close up 3

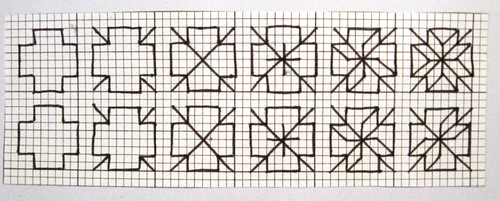
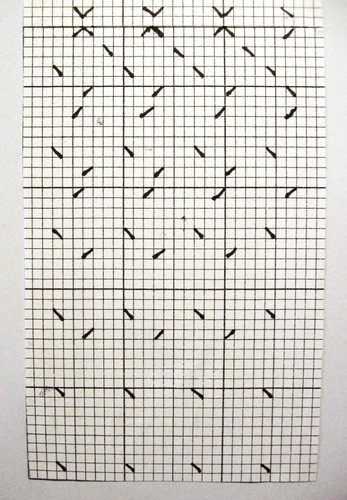
Tonal Column 2 – Using Spacing of Stitches

For column 2 I used one strand of embroidery floss and used one little pattern to alter the tone.
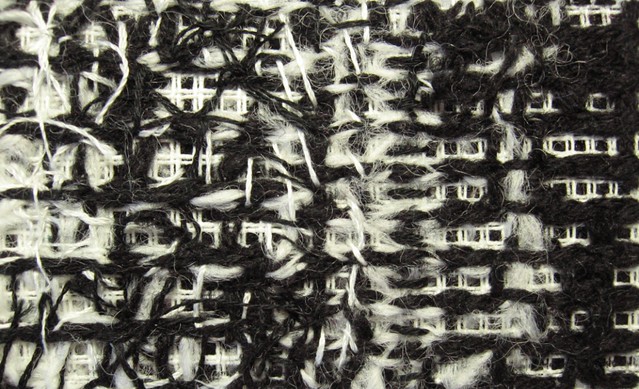
Image 4 – column 2:

Tonal column 2

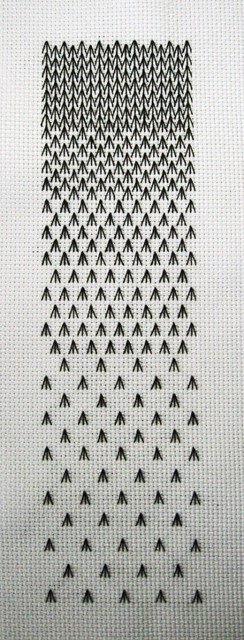
Image 5 – close up of column 2:

Tonal column 2 - close up

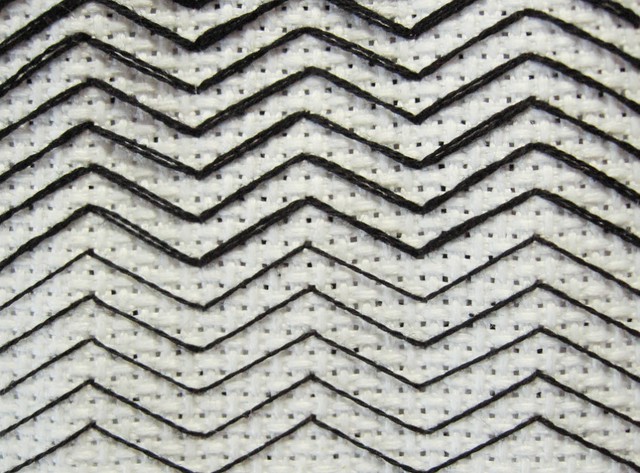
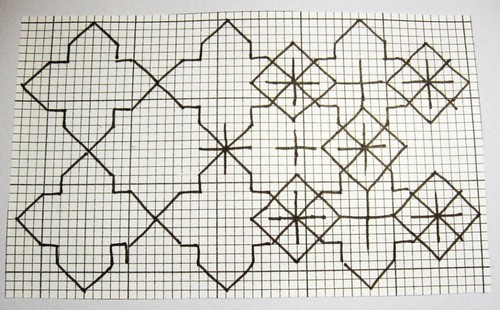
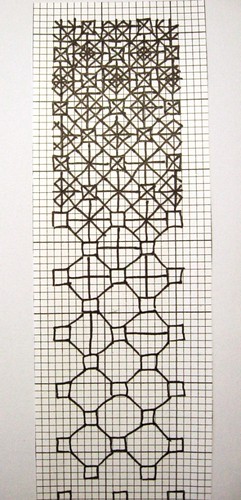
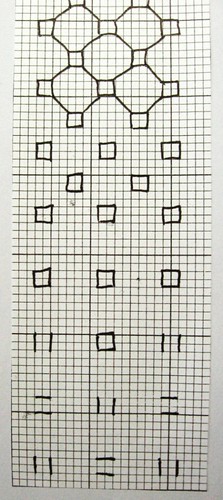
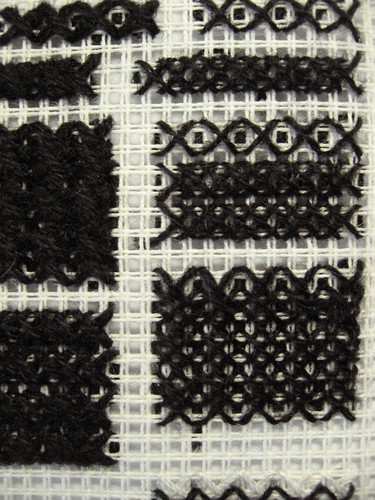
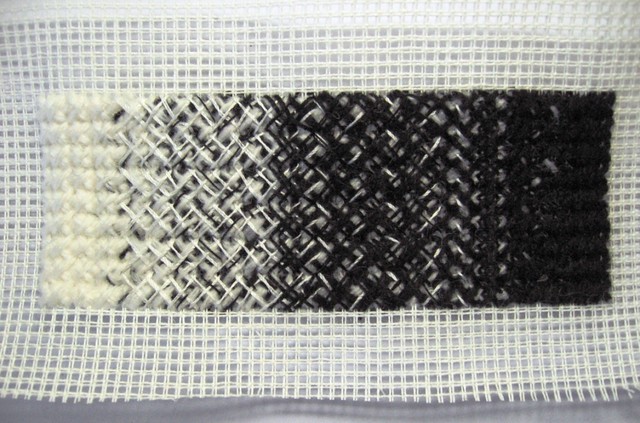
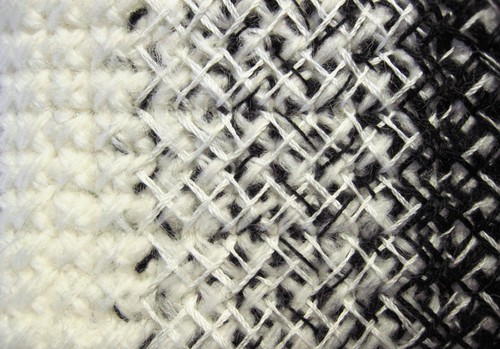
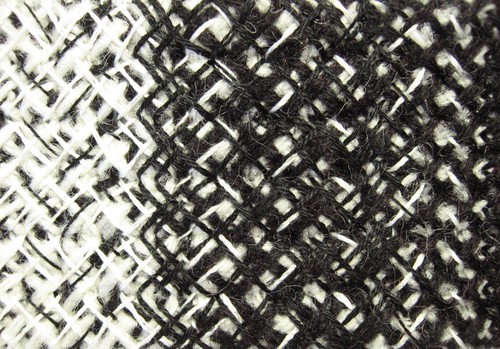
Tonal Column 3 – Varying Thread Thickness

For column 3 I built up the thickness of the thread starting with one strand of embroidery floss and ending with 12 strands.  I must admit that I did go wrong little along the way but unpicking would have been a nightmare so I bit my lip and decided to let it go.

Image 6 – column 3:

Tonal column 3

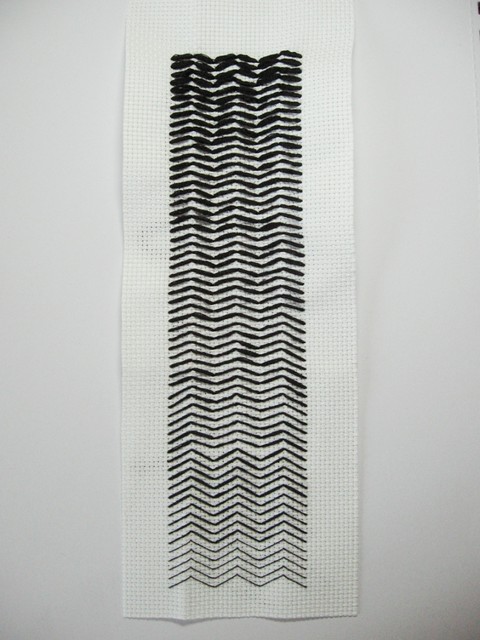
Image 7 – close up of column 3

Tonal column 3 - close up 1

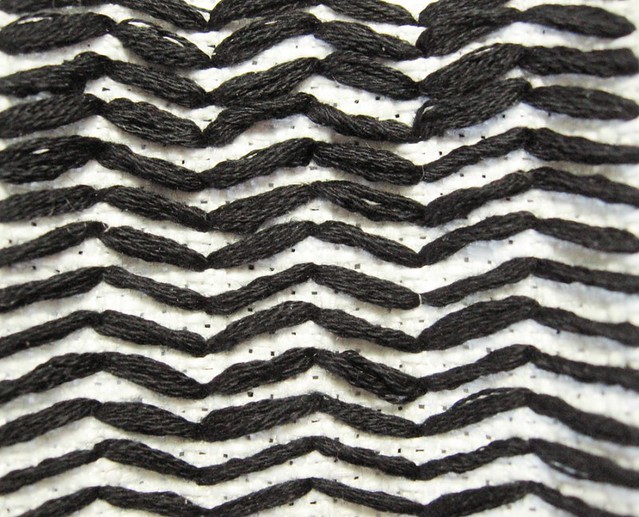
Image 8 – close up of column 3

Tonal column 3 - close up 3

Chapter 2 – Blackwork and Tonal Effects (1)

I began this section by noting a handful of blackwork patterns in my sketchbook (all hail graph paper!).

Image 1 – a handful of blackwork patterns:

Handful of blackwork patterns 1

Image 2- another handful of blackwork patterns!

Handful of blackwork patterns 2

Then I started to look at building up patterns within the patterns to explore tone.

Images 3/4/5/6 – tone within the patterns

Tonal development with pattern 1Tonal development with pattern 2 Tonal development with pattern 3 Tonal development with pattern 4

With a few little drawings done I decided to do something a bit bigger.

Image 7 – two tonal columns with blackwork patterning: 

Tonal development with pattern 5

Images 8/9/10/11/12 – close ups of image 7:

Tonal development in a pattern 5 - close up 1Tonal development in a pattern 5 - close up 2Tonal development in a pattern 5 - close up 3Tonal development in a pattern 5 - close up 4Tonal development in a pattern 5 - close up 5

I decided it was time to move onto the stitched part of this section of the chapter so I planned two more tonal panels.  The one that is in blue ink is simply because I picked up the wrong pen but seeing as it was purely for planning purposes I wasn’t bothered.  (I also found it was easier to follow the blue pattern).

Image 13 – stitch plans:

Patterns created for stitching

When I was working out the bottom part of the left-hand panel I did extra little drawings and one is included below.  The black ink represents the stitching (scaled by half) and the little blue dots helped me work out where I would be placing the small diamonds.  Using a different colour made it easier to see the pattern.

Image 14 -  planning drawing:

A 'working out' sketch

I will write about the stitching in the next blog entry but I must at this point reference the books I used for this part of the chapter.  Please see the reference link here.

Course References

Module 2

Brown, P. (2001). The Encyclopaedia of Embroidery Techniques. England: Search Press Ltd

Gostelow, M. (1976). Blackwork. London: B T Batsford Ltd

Gostelow, M. (1978). Coats Book of Embroidery. Canada: David & Charles (Publishers) Ltd

Hemingway, K. (ed.) (2002). The Essential Guide to Embroidery. London: Murdoch Books

Howard, C. (ed.) (1978). Textile Crafts. London: Pitman Publishing

Chapter 2 – Tonal Column in Stitchery

First I began by experimenting with some black yarn on a piece of canvas trying out different thicknesses (of the same yarn) and some pattern overlapping to build up a little confidence.

Image 1 – Practice canvas:

Experimenting

Image 2 – close up of practice canvas:

Experimenting - layering stitches

I wanted to try white under black – to fill the canvas holes.

Image 3 – black over white:

Experimenting - black on white stitching

With some practice done to build up a bit of confidence I set to it.  Here’s my final sample:

Image 4 – tone by stitch:

Tonal Column - Front

Images 5/6/7 – close ups

Tonal Column Close 1

Tonal Column Close 2

Tonal Column Close 3

Image 8 – Sian suggested looking at the reverse of the piece and I really rather like the effect (I think the haphazard stitching on the reverse, especially the black stitches over the white to the left, is interesting):

Tonal Column - Reverse

Images 9/10 – Close up of the reverse:

Tonal Column - Reverse Close 1

Tonal Column - Reverse Close 2