Friday 16 September 2011

Poster Paints - Notes

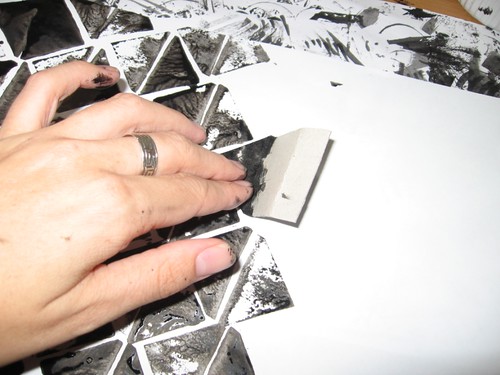
The poster paints I use are non-toxic.  A few guidelines for safe use are below:

  1. Staining is possible so protect clothing and soft furnishings well before use
  2. Stains may sometimes be removed by soaking in water overnight and then washing with soap and water
  3. The instructions on the bottle advise that you should clean brushes after use with soap and water however I only use water as I love my brushes and don’t want to introduce chemicals to them!

Bleach – Health & Safety Notes

Bleach can be pretty brutal stuff but also very effective when used carefully.  A few guidelines below for safe use:

  1. Use in a well ventilated area and consider a mask if using for prolonged periods
  2. Protect all surfaces and clothes to avoid any splash damage
  3. Use gloves
  4. If spraying bleach use a pair of googles to protect the eyes
  5. If working around children or animals do not leave bleach unattended at any time
  6. After contact with skin wash immediately with plenty of water
  7. If swallowed seek medical advice immediately
  8. Storage: Keep the container upright and only store, in the supplied vessel, in a cool dry place.  Ensure that the product is out of reach of children

Chapter 5 – Patterned Papers

I thoroughly enjoyed this chapter.  I did go to work with black fingernails but it just made me feel like an artist!

Image 1: Chopstick and poster paint:

Process

Image 2 – Toothbrush and poster paint

Process

Image 3 – Masking out a shape:

Process

Image 4 – Masked shape removed:

Process

Image 5 – Many masked shapes:

Process

Image 6 – Stamping triangles with card:

Process

Image 7 – Some finished papers:

Mark Making

Image 8 – Some finished papers:

Mark Making

Image 9 – Bleach on black paper:

Bleach on Black

Image 10 – Bleach on black paper:

Bleach on Black

Image 11 – Paperweight covered in bubble wrap (my favourite stamp):

Process

Image 12 – Stamping onto glass for prints:

Process

Image 13 – Shapes scraped from a layer of poster paint for prints:

Process

Image 14 – Finished papers:

Prints

Image 15 – Finished papers:

Prints

Health and safety notes that relate to this chapter are linked below:

Chapter 4 – Patterns from Animal Markings

I’m afraid I had a bit of a wine accident and spilt a glass over one of my pages.  Sorry about that…  Drawing isn’t my strong point but I did have a bash.

So starting off with this lizardy-iguana-type chap (Image 1).  He had heaps of pattern all over him:

Module 2 Chapter 4

The tactile person within couldn’t resist doing some contour interpretation (Image 2) – I tried to take a rubbing of the pattern but it wasn’t very successful:

Module 2 Chapter 4

Image 3 – Lazy cheetah:

Module 2 Chapter 4

Image 4 – Giraffe:

Module 2 Chapter 4

Image 5 - Zebra

Module 2 Chapter 4

Image 6 – Something lizardy!:

Module 2 Chapter 4

Image 7 – Tiger:

Module 2 Chapter 4

Image 8 – Some kind of bird that I saw at the Rare Breeds Centre in Totnes:

Module 2 Chapter 4

Saturday 3 September 2011

Gorilla Glue

“For the toughest jobs on planet Earth” the packaging claims.  It’s mighty strong stuff!

 Instructions for Use

  1. Lightly dampen one surface
  2. Spread a thin layer of Gorilla Glue onto the surface
  3. Clamp for 1-2 hours (at 20-54 degrees centigrade)
  4. Gorilla Glue will foam 3-4 times its volume which is why clamping is important for a good bond
  5. Working time is up to 10-15 minutes
  6. Cure time is approximately 80% in 1 hour, 100% in 24 hours
  7. Best used at room temperature

Caution

This product is harmful by inhalation and may cause irritation to eyes, the respiratory system and skin.  There is a possibility of a carcinogenic effect. 

Do not breath vapour – use suitable protective clothing and gloves!

In case of accident seek medical assistance immediately.  Individuals with chronic asthmatic conditions should consult a physician prior to using this product.

Further health and safety notes can be found on the product website:

http://uk.gorillaglue.com/eng/glues/glue-list/1/8/gorilla-glue-original.html

Storage Instructions

Wipe nozzle clean after use using a dry cloth.  Squeeze all air from the bottle and then replace the lid while still squeezing.

Information taken from the product packaging and website.