Saturday 31 December 2011

Chapter 9 - Playing with the Fibonnacci Sequence and the Golden Section

Image 1 - Exploring the Fibonnacci sequence using papers:

Chapter 9

Image 2 - The Fibonnacci sequence (middle), a copy taken and sliced at a 45 angle and re-pieced (left) with a second copy cut into long strips and re-pieced (right):

Chapter 9

Image 3 - Exploring the golden section with patterned papers:

Chapter 9

Image 4 - A copy of the page in image 3 is sliced up and re-pieced:

Chapter 9

Image 5 - The Fibonnacci sequence (bottom) and a copy taken, sliced lengthways and then re-pieced (top):

Chapter 9

Chapter 8 - Trimmings

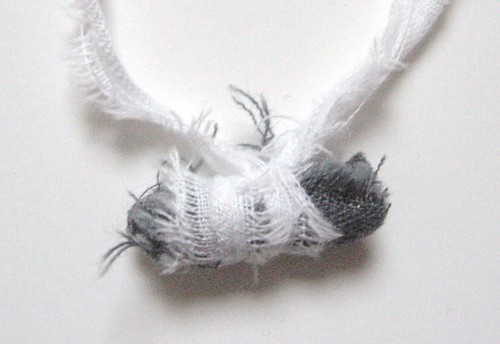
The second part of chapter 8 was about trimmings - making your own from fabric scraps.

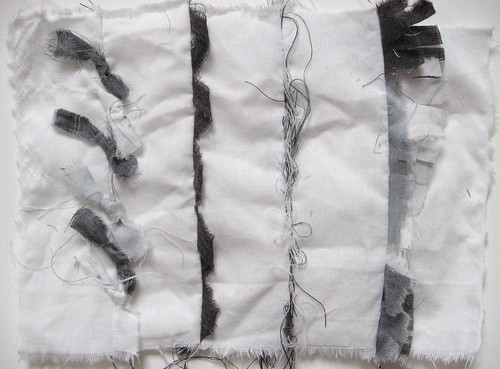
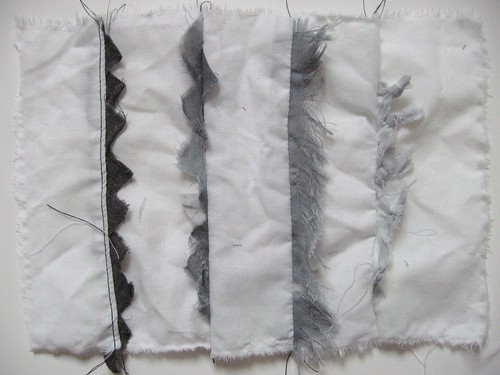
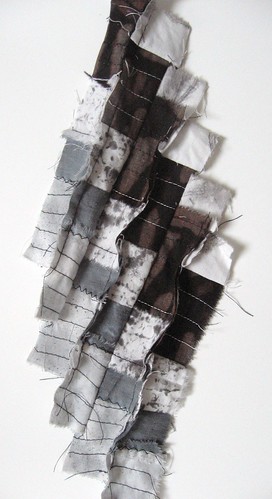
Image 1 - 'Ribbons' from fabric scraps (a close up is below this image):

Chapter 8

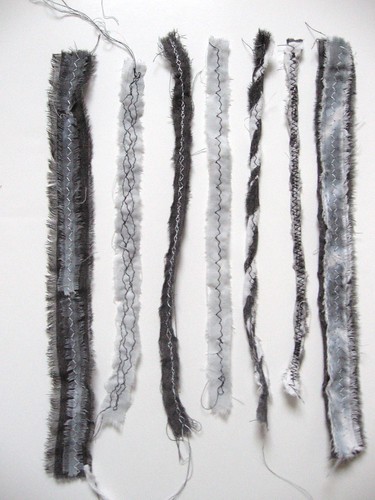
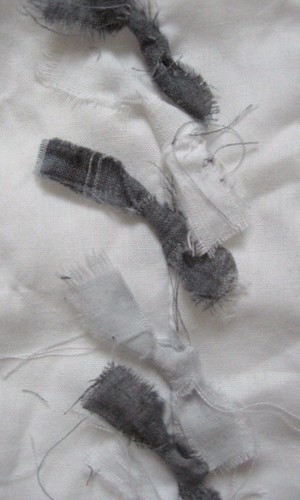
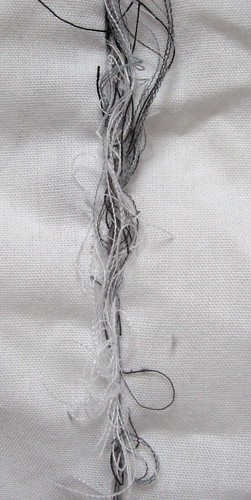
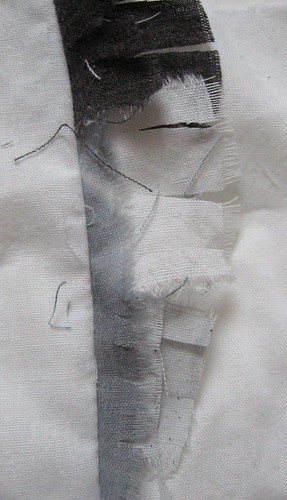
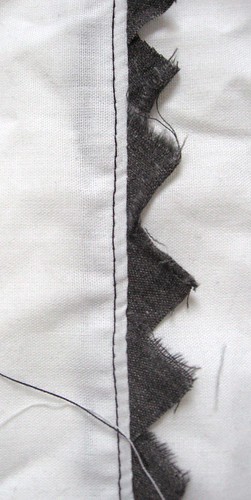
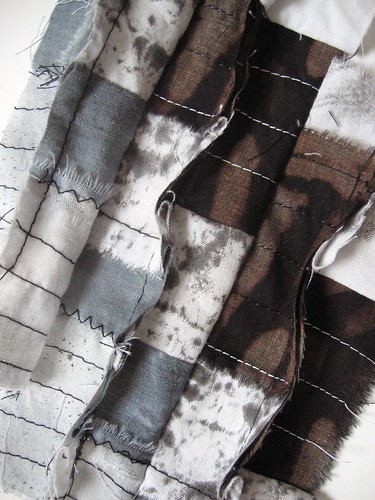
Image 2 - Close up of scrap 'ribbons' (descriptions below the image):
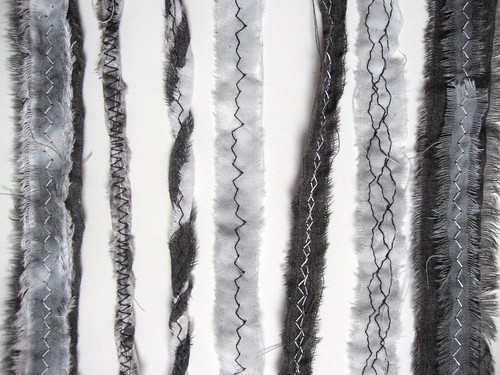
Chapter 8

From left to right:

  • three strips of fabric layered, sewn with white zigzag and then frayed
  • two strips of fabric twisted around each other and secured with black zigzag
  • two contrasting strips of fabric twisted around each other and secured with black zigzag
  • one strip of fabric with a black seam stitch
  • one strip of fabric with two rows of white zigzag
  • one strip of fabric with three rows of black decorative stitching
  • two strips of fabric layered, sewn with white zigzag and then frayed

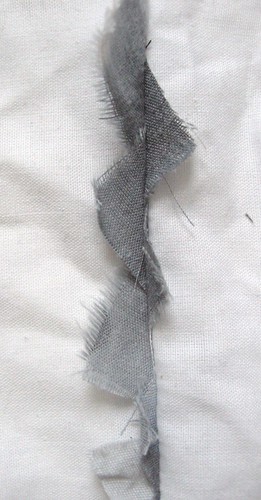
Image 3 - knotted strips:

Chapter 8

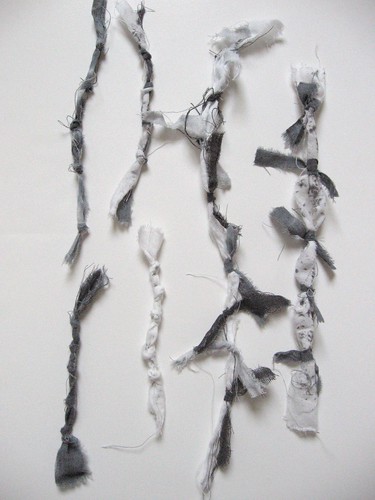
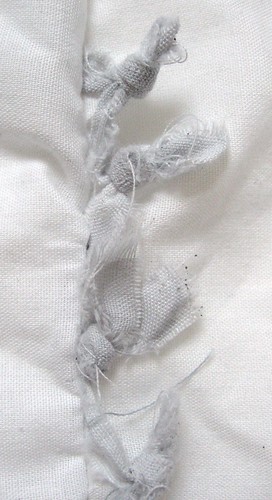
Image 4 - One strip of fabric with several pieces knotted around it:

Chapter 8

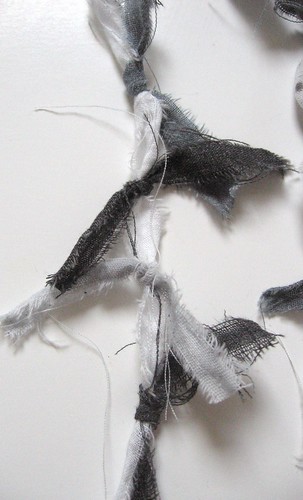
Image 5 - One strip of fabric knotted at intervals:

Chapter 8

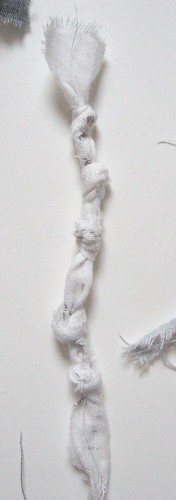
Image 6 - One wide strip of fabric with small pieces knotted around it:

Chapter 8

Image 7 - Fabric strips folded over and knotted:

Chapter 8

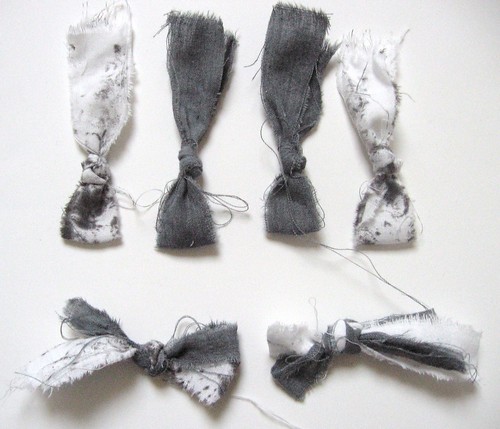
Image 8 - Close up from image 7 with two fabric strips folded over together and knotted.  The two looped pieces are then separated out:

Chapter 8

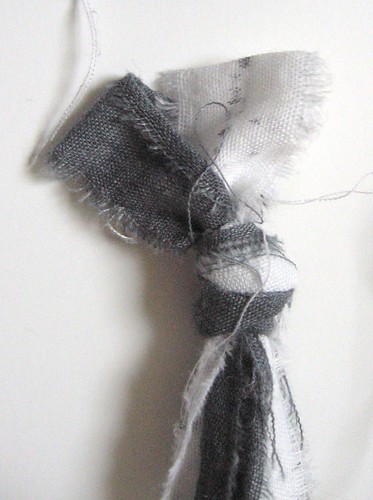
Image 9 - A tassel made from two pieces of fabric folded over, knotted and then the 'dangly bits' (!) are cut:

Chapter 8

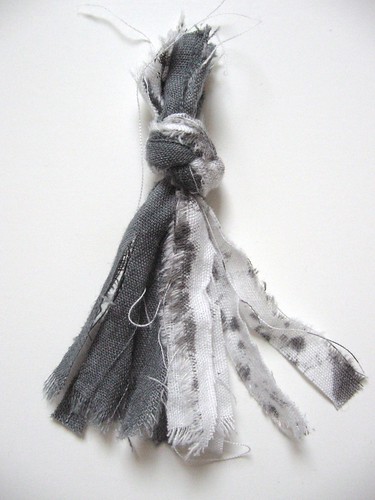
Image 10 - Toggles made from rolled up fabric strips and tied with either string or a thin piece of fabric:

Chapter 8

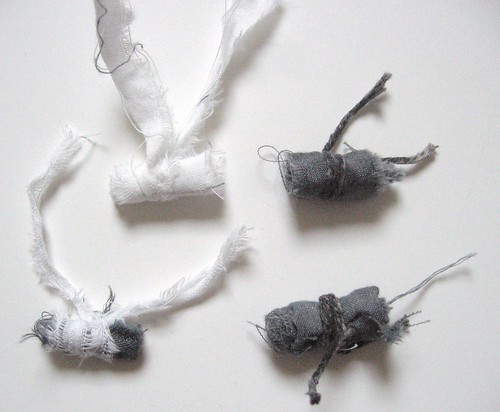
Image 11 - Close up of one of the toggles in image 10:

Chapter 8

Chapter 8 - Seaming Good Fun

Seams can be sew (sorry, couldn't resist the pun!) dull.  Let's make them more interesting!

Image 1 - Sample 1 (close ups are below this image):

Chapter 8

Image 2 - Fabric strips sewn into the seam and then tied together afterwards:

Chapter 8

Image 3 - Fabric strip looped into the seam before it is sewn:

Chapter 8

Image 4 - Thread off cuts from frayed fabric placed in the seam before sewing:

Chapter 8

Image 5 - Fabric off cuts place into the seam before sewing and then frayed:

Chapter 8

Image 6 - Sample 2 (close ups are below this image):

Chapter 8

Image 7 -   Triangles of fabric sewn into the seam and then a row of stitching forces them to sit one side of the seam:

Chapter 8

Image 8 - Triangles of fabric stitched into the seam:

Chapter 8

Image 9 - A strip of fabric placed in the seam and then frayed:

Chapter 8

Image 10 - A strip of fabric is knotted and then looped into the seam before sewing (this was quite difficult and involved a lot of pins but I like the outcome):

Chapter 8

Chapter 7 - Seminole Method

The second part of chapter 7 introduced the Seminole method of piecing.   This involves sewing together strips of fabric, cutting them and then re-sewing them to form a new piece of patterned material.

Image 1: Paper design for straightforward chequerboard piecing:

Chapter 7 - Seminole Method (Paper)

Image 2: Fabric sample for straightforward chequerboard piecing:

Chapter 7

Image 3: Three strips sewn, cut and rearranged:

Chapter 7

Image 4: Two rectangles sewn together and then pieced:

Chapter 7

Image 5: Paper design for staggered piecing:

Chapter 7

Image 6: Fabric sample for staggered piecing with some seams on the front (this one was produced after I worked through chapter 8 and it's my favourite sample):

Chapter 7

Image 7: Close up of fabric sample in image 6:

Chapter 7

Chapter 7 - Log Cabin Piecing

Chapter 7 is about 'piecing' methods and first I looked at the log cabin method.  This is quite an enjoyable method and the fabric samples came together very quickly.

Image 1: Paper design for off centre start:

Chapter 7

Image 2: Fabric sample for 'off centre' start:

Chapter 7

Image 3: Paper design for 'wonky' log cabin:

Chapter 7

Image 4: Fabric sample for 'wonky' log cabin:

Chapter 7

Image 5: Paper design for traditional log cabin:

Chapter 7

Image 5: Fabric sample for traditional log cabin:

Chapter 7

Chapter 6 - Masking

During Chapter 6 I tried out masking using a mixture of flour and water.  The results were varied (as can be seen on the previous blog post) but I thought I'd add here some images to show you what I did.  I'll let the photos explain.

Chapter 6 Masking
Chapter 6 MaskingChapter 6 MaskingChapter 6 MaskingChapter 6 MaskingChapter 6 MaskingChapter 6 MaskingChapter 6 MaskingChapter 6 MaskingChapter 6 MaskingChapter 6 Masking